
One of the biggest advantages of Beaver Builder is the tremendous number of modules available. No matter what type of element you need for your page, chances are our plugin includes it.
However, every site is different and requires unique features. If our pre-built options don’t meet all your needs, you can create a custom module in Beaver Builder to suit your need exactly.
In this article, we’ll cover what custom modules are, why they’re so powerful, and how to create your own. Then we’ll provide some examples to get you started. Let’s dive in!
An Introduction to Custom Modules in Beaver Builder
As you may already know, modules are the basic building blocks used by Beaver Builder to create pages.
Out of the box, our premium plugin features a large selection of modules to suit nearly any layout, from basic text and photos to advanced sliders and Call to Action (CTA) elements.
However, if you find yourself needing something a little different than what’s available by default, don’t worry. Each Beaver Builder module can be customized to fit your needs via its settings. However, if you need an even more personalized solution, you can create completely new modules from scratch.
Custom modules enable users to craft nearly any layout you can imagine, from custom gallery views to complex multi-column designs. This makes Beaver Builder a supremely flexible option for designing websites. The only limit is your creativity.
Best of all, any modules you create can be reused across your site and even exported to other sites. Once you’ve coded and installed a module, adding it to any page is as simple as drag and drop. You can even incorporate your own settings pane for your new element.
How to Create a Custom Module Using Beaver Builder (In 5 Steps)
Creating a custom module using Beaver Builder involves working with code and isn’t a beginner-level task. As we dive into this process, we’ll assume you’re at least somewhat familiar with basic web development principles and languages including PHP and CSS.
If you’re not familiar with these skills or need to brush up on your knowledge, W3Schools has a tutorial on PHP and another on CSS. Once you’re ready to dive in, proceed with the steps below.
Step 1: Create a New Plugin
The first step is to create a simple plugin. Adding your module to the plugin, rather than directly to Beaver Builder, ensures that it won’t be overwritten by updates.
To create this plugin, you’ll need access to your WordPress filesystem. This can be accomplished using either a File Transfer Protocol (FTP) client such as FileZilla or through the file manager in your web host’s cPanel.
In your filesystem, navigate to wp-content > plugins, which is the default location for WordPress plugins. Create a new folder and give it a unique name using lowercase letters and dashes, such as custom-builder-modules.
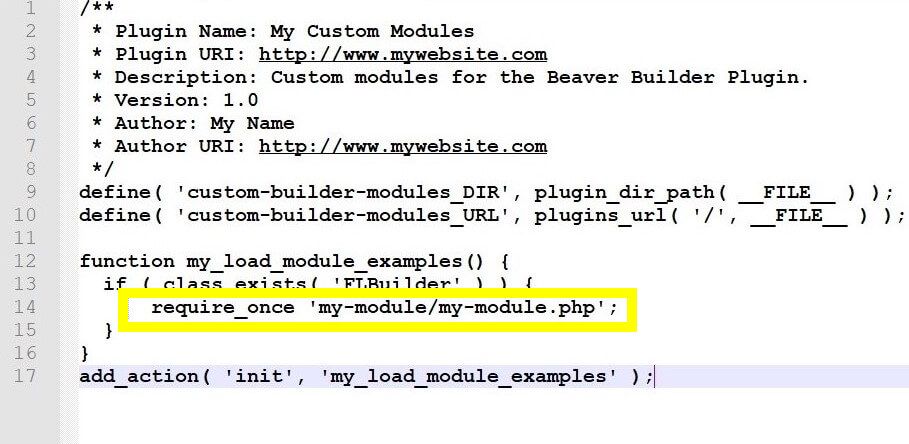
Inside that folder, create a new PHP file with the same name as the folder (e.g., custom-builder-modules.php). In this file, paste the following code:
/**

* Plugin Name: My Custom Modules
* Plugin URI: http://www.mywebsite.com
* Description: Custom modules for the Beaver Builder Plugin.
* Version: 1.0
* Author: Your Name
* Author URI: http://www.mywebsite.com

*/

define( 'MY_MODULES_DIR', plugin_dir_path( __FILE__ ) );
define( 'MY_MODULES_URL', plugins_url( '/', __FILE__ ) );

function my_load_module_examples() {
	if ( class_exists( 'FLBuilder' ) ) {
		// Include your custom modules here.

	}
}

add_action( 'init', 'my_load_module_examples' );
Replace the fields at the top with your own information. The ‘MY_ MODULES_DIR’ and ‘MY_MODULES_URL’ constants should also be changed to match the namespace of the plugin. As you can see in this example, you can add any custom modules you develop to the same directory in the same plugin, but in this tutorial, we’ll focus on creating a single custom module.
When you’re finished, head to your WordPress dashboard, navigate to Plugins, and activate the new plugin:

Step 2: Add a Module to Your Plugin
Now you can build your custom module so you can add it to the plugin you created. Create a new subfolder inside your plugin folder (custom-builder-modules) and give it a unique name.
For this example, we’ll use my-module.
Create a new PHP file inside the folder with the same name (my-module.php). Open this file for editing and paste in the following code:
class MyModuleClass extends FLBuilderModule {

	public function __construct() {

		parent::__construct(array(
			'name' => __( 'My Module', 'fl-builder' ),
			'description' => __( 'A totally awesome module!', 'fl-builder' ),
			'group' => __( 'My Group', 'fl-builder' ),
			'category' => __( 'My Category', 'fl-builder' ),
			'dir' => MY_MODULES_DIR . 'my-module/',
			'url' => MY_MODULES_URL . 'my-module/',
			'icon' => 'button.svg',
			'editor_export' => true, // Defaults to true and can be omitted.
			'enabled' => true, // Defaults to true and can be omitted.
			'partial_refresh' => false, // Defaults to false and can be omitted.
		));

	}
}
This code assigns your module to a class, which you’ll need to register with Beaver Builder in Step 3. The class name in the code should follow the name of your module. By convention, class names concatenate words by capitalizing each word.
Next, include the module in the plugin you created by pasting the following code into your plugin file (custom-builder-modules.php):
require_once ‘my-module/my-module.php’;
This code should replace the line that reads //Include your custom modules here towards the bottom of the file:
Step 3: Define Settings for Your Module
With your module registered, the next step is to define the settings you want to appear for the module in the Beaver Builder page builder. The basic code looks like this:
FLBuilder::register_module( ‘MyModuleClass’, array() );
The array is where you’ll define the tabs, sections, and settings that appear in the settings pane for the module within Beaver Builder. There are a lot of settings available to you, such as alignment toggles (left, right, center), borders, color pickers, text entry fields for custom CSS and JavaScript, and more.
What settings you include depends on your vision for your module and how it’ll be used. To see all the settings available plus code examples, check out the full setting fields reference in the Beaver Builder Custom Module Developer Guide.
Keep in mind that even if you’re building this custom module with a specific use in mind, you can incorporate it in future pages and other projects as well. More settings will give you more flexibility down the line.
Step 4: Add the Module’s Front End HTML
The last required step is to create a front-end HTML file for your custom module. This code renders the module on the live web pages where you’ve incorporated it.
First, go into your module folder (custom-builder-modules > my-module) and create another new folder named includes. Then add a file to it called frontend.php. So, the full path to your custom module’s HTML file should be: custom-builder-modules > my-module > includes > frontend.php.
<div class="fl-example-text">
	<?php echo$settings->textarea_field;?>
	<?php $module->example_method(); ?>
</div>
You can learn more about the variables for the HTML file in our official documentation. The specifics of this step depend on what type of element you’re creating a module for. You’ll need to rely on your own coding knowledge to complete this task.
Step 5: Style Your Module with CSS
At this point, your module has everything it needs to function. However, you might want to give it some style by adding CSS.
Custom CSS for your module can be applied by adding a new folder and file to the directory containing your module’s other code. The path should like something like this: custom-builder-modules > my-module > css > frontend.css.
Any CSS you add here will be applied to all instances of your custom module in Beaver Builder.
Here’s an example of the code you might want to include:
.fl-node-<?php echo $id; ?> {
	background-color: #<?php echo $settings->bg_color; ?>;
}
This code adjusts the background color of your module. Simply use HTML color codes to fine-tune the look of the element.
Once your module is styled the way you want, you’re all set. You should now be able to access it from the Beaver Builder editing screen and use it on any page you want.
Examples of Beaver Builder Custom Modules
Developers have created some amazing custom modules for Beaver Builder. To give you some examples of what you can do, we’ll showcase three of our favorites.
First is a custom image comparison slider that lets you drag a sliding bar to compare two images:
ou can drag the bar to show more or less of each image. This could be very useful when showing photos of the same subject taken on different cameras, for example. It also works well for before and after shots. You can find the full process for creating this module in our knowledge base.
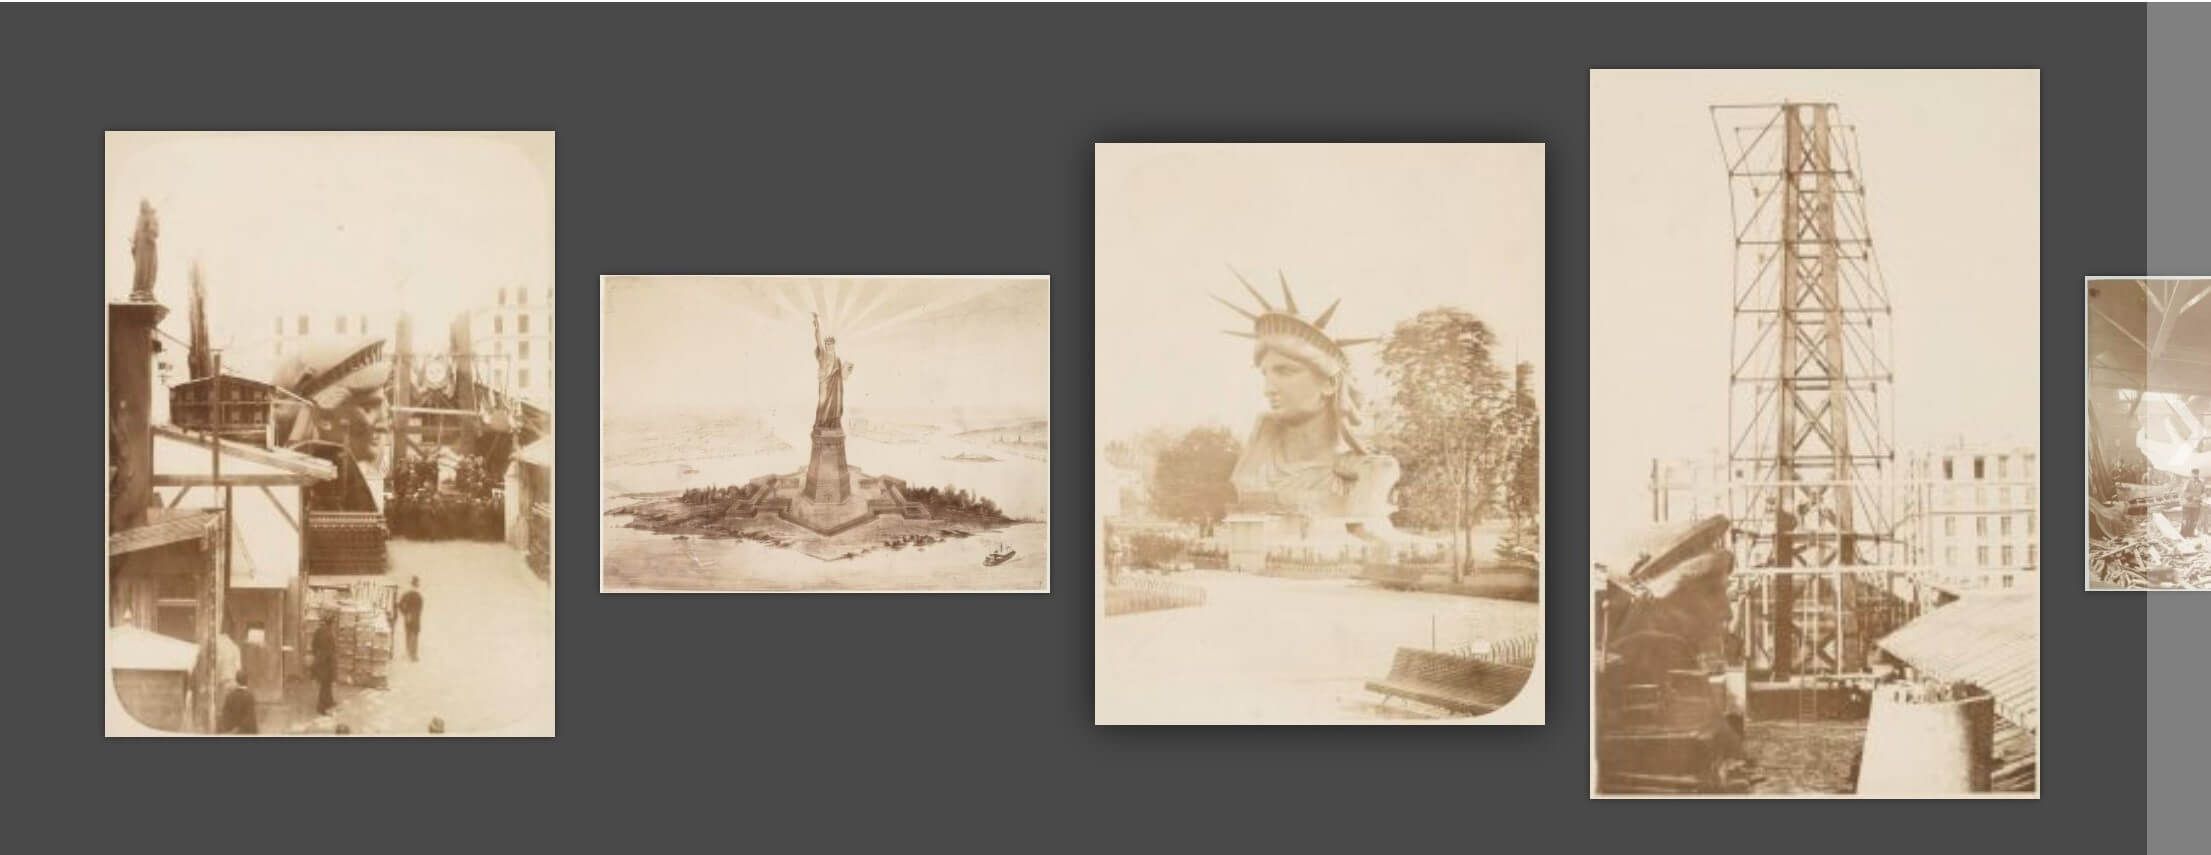
Next is a horizontal sliding image gallery called Broadside from Crafty Beaver Custom Modules. This beautiful image gallery is perfect for showcasing designs, posters, and other media and would be ideal for a portfolio page:
Finally, there’s the Timeline Module for Beaver Builder, which is available as a free plugin in the WordPress Plugin Directory. It adds the module to your Beaver Builder installation, so you can include it in any page layout:
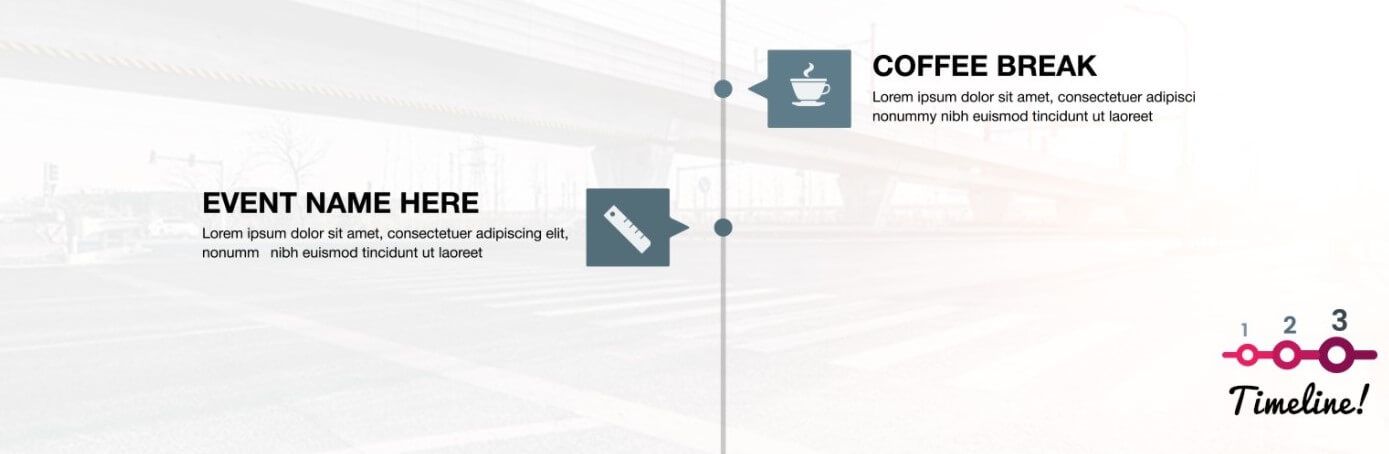
A timeline like this is perfect for showcasing events with a little flair.
Conclusion
One of Beaver Builder’s greatest strengths is its flexibility. Whether you just need to make a slight tweak to an existing element or want to create something entirely new, our plugin’s support for custom modules gives you the power to do it.
To create your own module, just follow these five steps:
- Create a new plugin.
- Add a module to the plugin.
- Define settings for the new module.
- Add the module’s front end HTML.
- Style your new module with CSS.
What are your favorite uses for custom modules? Let us know in the comments section below!
1 Comments
Our Newsletter
Our newsletter is personally written and sent out about once a month. It's not the least bit annoying or spammy.
We promise.
Try Beaver Builder Today

Related articles

Beaver Builder Birthday: Celebrating 10 Years of Success!
Heyo! Can you believe it’s been 10 years since we kicked off this wild ride with Beaver Builder? Buckle up…

How To Add Content Restriction in Beaver Builder
Wondering how to restrict content in Beaver Builder? If you run an online business built around premium content or educational…

Craft High-Converting Popups: Popup Maker and Beaver Builder
Popups are a powerful tool for grabbing your website visitors’ attention and driving conversions. But crafting visually appealing and effective…
Join the community
We're here for you
There's a thriving community of builders and we'd love for you to join us. Come by and show off a project, network, or ask a question.
Since 2014
Build Your Website in Minutes, Not Months
Join Over 1 Million+ Websites Powered By Beaver Builder.
Hi Will.
I’m not sure what’s going with the example code.
But the line in Step 1 with the call to class_exists returns a syntax error:
syntax error, unexpected ‘FLBuilder’ (T_STRING), expecting ‘)’
This confuses me, because the syntax looks ok.